

Installation #
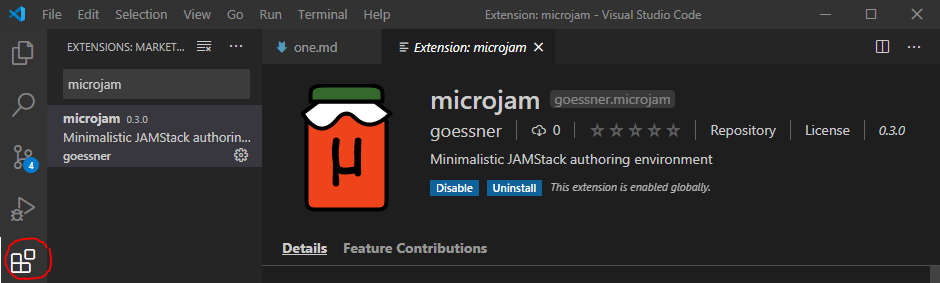
This is an installation guide for μJam, an extension to Visual Studio Code. VS Code is a powerful and heavily used open source editor from Microsoft available on Linux, Mac and Windows platforms. The most important feature in this context of website creation and authoring is VS Code being a highly sophisticated Markdown Editor.
So in using this installation guide we need only few prerequisites.
- Minimal knowledge of markdown. Here is an overview of its basic syntax.
You may like to hear that ...
- no programming skills are required.
- initializing and creating websites can be done completely inside of VS Code.
- interested but impatient persons can skip all Information and Explanation labeled sections below.
We will do that in three simple steps:
A New Project #
For a new project we need a project folder, where everything necessary can reside in. For creating that new folder
- Open a new terminal session right in
vscodeeditor.
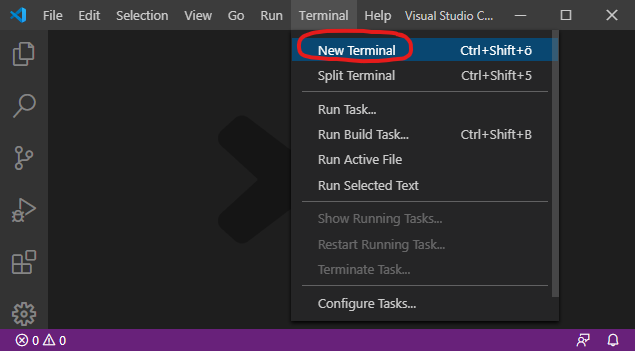
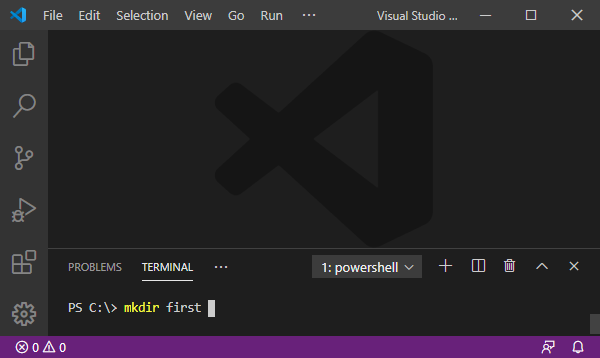
- Type in the terminal window the command
mkdir(make directory) and ...
specify with it the path to our new project folderfirst.
> mkdir <new folder path>
Important !
For simplicity reasons the root directory'/'is taken here as the location of the project folder. This should be avoided in general and is even restricted under Unix / OSX. Take your/homedirectory instead (> cd ~).
- We navigate to our newly created folder via
cd(change directory) and create there another directorydocs.
> cd first
> mkdir docs

We want to create the first file in our nearly empty directory first.
- Select in the menu
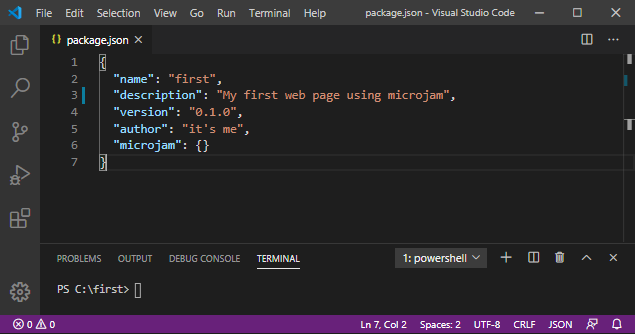
File > New File(Ctrl + N). - Copy and paste the following text into its window (Ctrl + C, Ctrl + V).
{
  "name": "first",
  "description": "My first web page using microjam",
  "version": "0.1.0",
  "author": "it's me",
  "microjam": {}
}
- Save the file via
File > Save As...(Ctrl + Shift + S) giving it the namepackage.json. Save it into the new project directoryfirst.
With that we finished our first step in creating a new project and will proceed in generating some content.
Generating Content #
We now start to write some Markdown documents using vscode as markdown editor.
Information !
μJam basically differentiates between three different types of documents:
pagerepresents a stand-alone web page like anaboutpage.articles are web pages building a consecutive list of entries like blog posts.indexrepresents the main page, potentially holding a table of contents of allarticlepages.A certain layout is assigned to each of these three types.
At this moment we have a tiny directory structure:
/first
|_ package.json
|_ /docs   (empty folder)
page Document #
Let's create an about page for our first web site.
- Copy and paste the following text into a new markdown window (Ctrl + C, Ctrl + V)
---
"layout": "page",
"title": "About"
---

# About this Site

This site was created as a simple collection of markdown files using minimalistic *Static Site Generator* **μJam**.
- Save it to file
about.mdin the newdocsdirectory (Ctrl + Shift + S). - Show preview window by pressing the red-circled preview-button (Ctrl + K V).
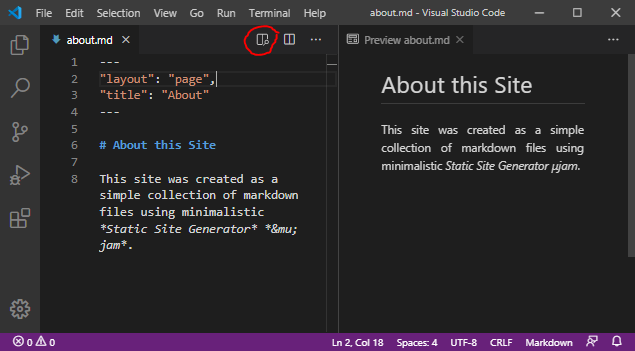
Explanation !
While working on a markdown file you can always examine the html-result visually side-by-side in a preview window (Fig. 5). Please note some front matter metadata at the top of ourabout.mdfile. These metadata are enclosed between two lines of three dashes---and so separated from the following markdown text. That separator style is taken fromyaml, but the metadata itself has to followjson-syntax strictly.
We now want to open our complete project folder in vscode.
Explanation !
After having successfully savedabout.mdinto thedocsfolder – which is our first content file in this project – we might have realized, that the project directory structure has changed significantly – magically. We want to proof that byvscode's comfortable Explorer View.
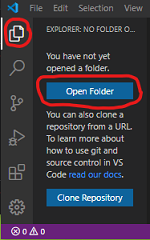
- Switch on the Explorer View by pressing the uppermost symbol of the Activity Bar, located on the far left-hand side of the editor.
- The Explorer View opens and asks us to
'Open Folder'. Pressing this button and selecting our directory/first, we get a nice view of our folder structure (Fig. 6). At the same time the Status Bar color has turned from purple to blue.

Explanation !
- In our
docsfolder two additional files appeared:
- all generated
html-files, which got the filename from their correspondingmd-files. So we have hereabout.htmlsolely.pages.jsonholding a list of extended metadata extracted from all markdown files. At that time it contains an array literal including metadata of a singlepage-file now.- A new
themefolder was created inside ofdocs. It contains
template.json, which holds the default templates for generatinghtml-files frommd-files.- a single stylesheet file
styles.cssused byhtml-files.If you want to extend this directory structure, add files or modify your templates – maybe you want to add some scripts – you can do this manually at any time from now on.
μJamwon't touch your folder structure and templates anymore. This was an initial one-time action only.
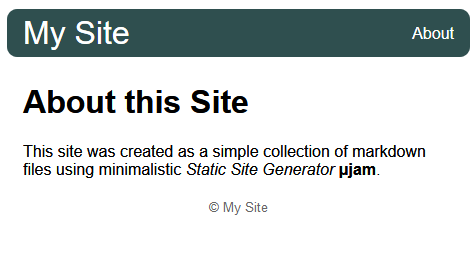
Now you can view your first web page in the browser of your choice.
- Drag 'n drop
about.htmlfrom the editor's Explorer View (Fig. 6) into the browser's adress bar ... and voilà.
article Document #
We want to maintain a series of article documents, possibly as posts for use with a weblog.
Information !
articledocuments are not so much different frompagedocuments. In the front matter metadata we need to have adatemember. Adding adescriptionmember is recommended.
The workflow is illustrated now by the creation of two articles:
- Open a new file via
File > New File(Ctrl + N). - Copy and paste the following text into that window (Ctrl + C, Ctrl + V)
- Save it to file
one.mdin thedocsdirectory (Ctrl + Shift + S).
one.md
---
"layout": "article",
"title": "Article One",
"description": "This is the first article",
"date": "2020-03-22"
---
### Abstract
This is the first article. We are mainly testing `syntax highlighting` here.

## 1. Syntax highlighting

### 1.1 Html
```html
<!doctype html>
<html>
    <head>
        <title>About</title>
    </head>
    <body>
    <header>header</header>
    <main>
       content here
    </main>
    <footer>footer</footer>
    </body>
</html>
`` `
- Open a new file via
File > New File(Ctrl + N). - Copy and paste the following text into that window (Ctrl + C, Ctrl + V)
- Save it to file
two.mdin thedocsdirectory (Ctrl + Shift + S).
two.md
---
"layout": "article",
"title": "Article Two",
"description": "This is the second article",
"date": "2020-03-23"
---
### Abstract
This is the second article. Here we are testing math formulas and embedded `svg`.
## 1. Testing
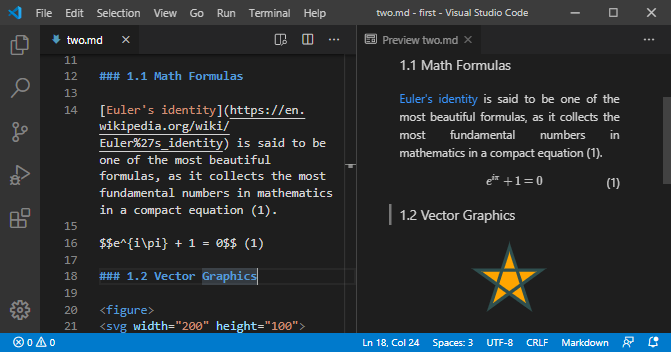
### 1.1 Math Formulas
[Euler's identity](https://en.wikipedia.org/wiki/Euler%27s_identity) is said to be one of the most beautiful formulas, as it collects the most fundamental numbers in mathematics in a compact equation (1).
$$e^{i\pi} + 1 = 0$$ (1)
### 1.2 Vector Graphics
<figure>
<svg width="200" height="100">
<path d="M100,10L123.5,82.4L61,37.6L138,37.6L76.5,82.4Z"
stroke="darkslategray" stroke-width="4" fill="orange"/>
</svg>
<figcaption>Fig. 1: SVG Star</figcaption>
</figure>
Explanation !
While having saved these two*.mddocuments for the first time, their corresponding*.htmldocuments were created and also their front matter metadata have been extracted, slightly extended and appended to the list of the pages metadata inpages.json. Please note, thatμJamwill update metadata during consecutive files storages and even remove them together with the*.htmlfiles, when you delete a markdown file manually from the file system.You also might have noticed that we mixed LaTeX math and SVG markup into our markdown text of file
two.md(Fig. 8).
index Document #
Let's create the homepage of our website now.
Information !
Any markdown document marked as"index"in its frontmatter layout entry will get appended a list of allarticles immediately after its normalcontentsection.
- Open a new file via
File > New File(Ctrl + N). - Copy and paste the following text into that window (Ctrl + C, Ctrl + V)
- Save it to file
index.mdin thesrcdirectory (Ctrl + Shift + S).
---
"layout": "index",
"title": "My Site",
"date": "2020-03-24",
"description": "Homepage of microjam demo site",
"tags": ["microjam","Jamstack","static page","personal",
         "student","academics","math","vector graphics"],
"category": ["web","math","graphics"]
---

This is a demo site containing some articles. It was made by **μJam**, a minimalistic static site generator.
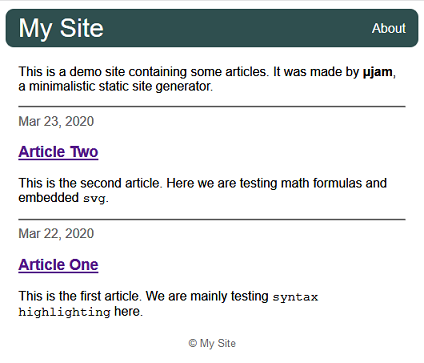
Explanation !
Since botharticledocuments haveabstractsections, that content is used for articles' short description. In case of a missingabstractsection, thedescriptionentry from frontmatter metadata would have been taken instead.
The content generation process of the demo site is complete now.
Publish to the World #
We want to use well known GitHub here.
And we want this version control hosting platform be connected with our local project repository via vscode.
Information !
GitHub as a highly used platform is a code sharing service. But in contrast to mere cloud storage providers GitHub primarily supports project work, where files are regularly edited, uploaded and needed to be managed through version control. This is exactly, what we want to have with our website project and best of all: GitHub provides us with an online repository for free. We then simply have a storage space, called repository, where our project resides on the web. This is not a classical webserver. In the sense of Jam it is a CDN – content delivery network.
The Local Git Repository #
Git is a powerful version control tool, which allows us to create and manage a local repository.
Information !
With it we then have a version control tool Git collaborating with the version control hosting platform GitHub. And Visual Studio Code comes with source control integration and especially has excellent Git support.
Important !
Chances are good that Git is already installed on your local machine. Input'> git --version'at your terminal command line. will show you the current version installed. Otherwise, if you are told thatgitis unknown, you need to install it. Don't worry, this can be easily done by visiting that download site. I will wait here.
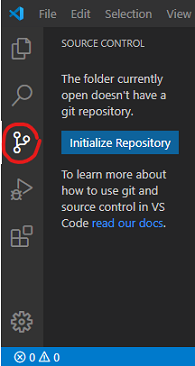
- Navigating to the third symbol of the left vertical Activity Bar ... press it.
- Press the blue button named
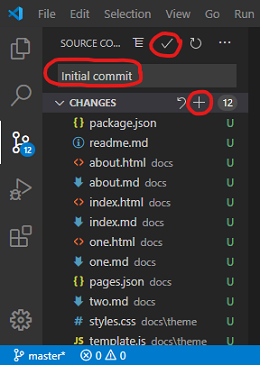
'Initialize Repository'. - Type in the commit message
'Initial commit'. - Ctrl + Enter or ...
- Move the mouse over
'CHANGES'saying Stage All Changes. - Press the
+sign. - Press the check mark.
- Move the mouse over
Explanation !
- By initializing our local repository we added a hidden directory named
.gitto our project folder. Fortunately, we don't have to worry about it at all.- In the source control view with step 3 we see our 12 files labeled
U, which stands for untracked file.- After
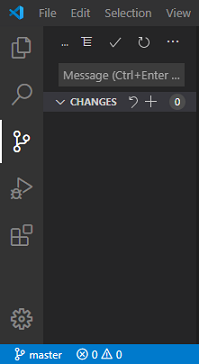
Stage All Changesin step 4 all files were labeledAthen, meaning added to the repository.- After step 5 all files vanished from git view, meaning that git took complete control over their versioning from now on. No changes to files can be seen.
To learn more here, I recommend reading 1 [4] and [5].
How helpful git now is for us becomes apparent, when we change the content of ... say one.md and then save the file (Ctrl + S).

Explanation !
The git view shows four files labeledM, meaning modified.
- We changed
one.mdmanually.- While saving it,
one.htmlwas newly created/overwritten.pages.jsonwas modified automatically.- Since
one.mdis anarticlefile, the article list ofindex.htmlis potentially affected and fileindex.htmlwas updated.Steps 1-3 are always performed under the hood by μJam on markdown file storage.
We can again directly commit these changes now or do that later, while going on and continue to work on other markdown source files.
The Online Repository #
You want to see your pages online now? So you need a personal user GitHub account for proceeding.
Important !
If you do not have a personal user GitHub account, you need to sign up for a new free GitHub account here . Please also note, that you are requested to provide a working email address during verification process.
Now that you are the owner <username> of a GitHub account ...
- Navigate your personal browser to
https://github.com/<username>. - In the upper-right corner of that GitHub page, use the
+drop-down menu, and selectNew repository.

- Fill out the formular ...
- Take a short, memorable
<repository name>like'first'. - Description:
'First microjam powered web site'or similar text. - Choose public or private.
- Leave the rest as it is.
- Press button Create repositiory.
- Take a short, memorable

- In a new browser tab/window navigate to
https://api.github.com/users/<username>. - Copy your
<github user id>from the second line (a series of 6 or more decimal digits) (Ctrl + C) [3]. - In the terminal window (on the command line), type:
> git config --global user.name <github user id>
> git remote add origin https://github.com/<username>/<repository name>.git
> git push -u origin master
Explanation !
Please note, that use of these terminal commands is necessary for the first time file transfer to GitHub only. So having done that once, you can forget it forever.
The result of that action on your GitHub account page will be something like this ... (refresh page!)

We will take care about the README in a minute. Now we can't wait to see our website online.
- Select
settingson your GitHub account page. - Scroll down to
GitHub Pages. - In
Select sourceset checkmark atmaster branch / docs folder. - Navigate to the url shown at
'Your site is published at'.

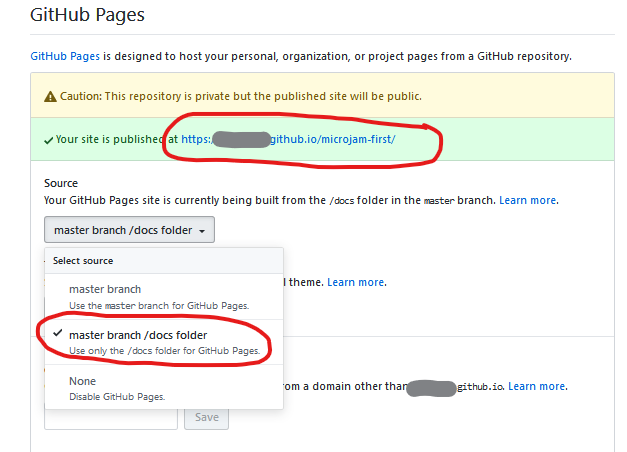
Congrats, your first website is online now !