

Usage #
Prerequisites #
It is assumed, that you
- have installed Visual Studio Code.
- have basic knowledge, how to use Visual Studio Code.
- successfully installed μJam extension to VSCode.
Activation #
μJam is an extension to VSCode and VSCode will activate it under certain conditions. As μJam deals primarily – or more precise exclusively – with markdown files, it will get activated, when you either
- open your first markdown file, or ...
- start VSCode with a markdown file as its active document

You will see an activation message in the lower right corner of VSCode window. You do not necessarily have your repository folder opened in VSCode. μJam will work with single file mode also.
But ... having μJam activated properly does not mean, it works with every markdown file. It accepts files
- being in a
docsdirectory or one of its subdirectoriesdocs/**and ... - belonging to a repository having an entry
"microjam": {...}in itspackage.json
only.
Editing Markdown Files #
μJam can do exactly two things for you:
- generate/update a
htmlfile from a singlemdfile ... - generate/update
htmlfiles from allmdfiles in a repository
Single Markdown Files #
Whenever you are working at a markdown file and save it via
- menu
File > Save Asor (Ctrl + Shift + S) or ... - menu
File > Saveor (Ctrl + S)
its corresponding html file will be generated automatically by μJam, which will also update the pages.json file and possibly some index files, if you happened to have modified a "layout":"article" document.

Note:
ThatFile > Savecommand only saves its markdown file, if it has been modified since its last storage command. Only in this case the correspondinghtmlfile is updated.
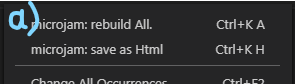
In order to assist you to force an update of a single file, μJam provides us with the command Ctrl + K H (think Html). This is also available via different menus (see below).
All Markdown Files #
There might come up the necessity to rebuild all html files. One scenario is, we just had modified our templates in template.js.
To achieve this, we can use the μJam command Ctrl + K A (think All).
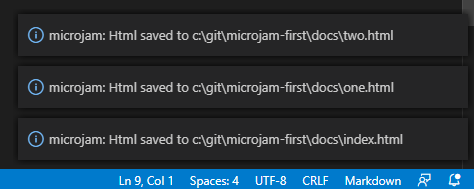
Please note, only the last three rebuilt files are are visible after completion as μJam messages then.
Menus #

Both μJam commands are accessible through
- Editor context menu (right click) (a)
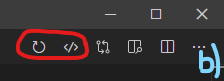
- Editor title menu (b)
- VSCode global command palette (c)
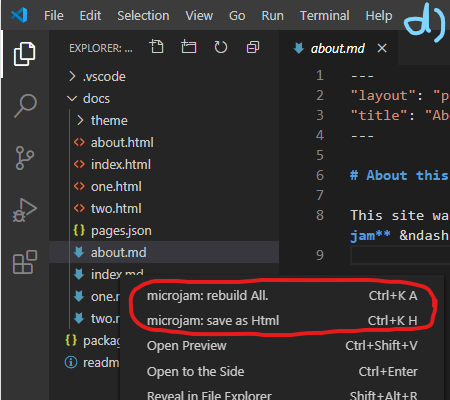
- Explorer context menu (d)
Note:
Menus in VSCode are defined statically with extensions like μJam. So above menus are always shown while editing any markdown document. But with markdown documents not belonging to a valid repository invoking these menu commands will silently have no effect.
Manually Remove Files #
You won't want to remove auto-generated files usually, as they are regularly updated by μJam. But if you explicitely want to do that, it you can use the explorer view (Fig. 5).
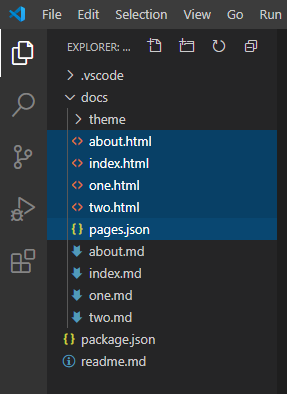
- It is safe to remove all
*.htmlfiles as well aspages.json(Delete or Shift+Delete). - If you manually remove a markdown file, its corresponding
htmlfile will be consistently deleted by μJam during next command execution.pages.jsonwill be also updating accordingly. - You can delete the
docs/themefolder and even the.vscodedirectory. μJam will generate them again using default content. But be aware, that possible customizations or ccopies get lost then. You usually don't want to do that. - You shouldn't delete any other files from your repository, except you know, what you are doing.
Note:
Sort order of files by type makes sense in explorer view, but it's not VSCode's default order. So μJam adds an entry"explorer.sortOrder":"type"to user settings file.vscode/settings.json. You can add more individual settings to that file.
Frontmatter Snippet #
When starting a new markdown file, μJam assists you by inserting a partial filled frontmatter template at current editor location.
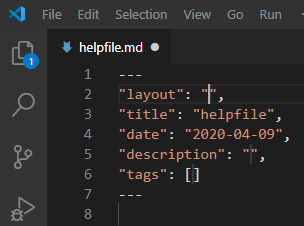
Simply type Ctrl+k - for getting this.
Table Of Content Snippet #
When finishing a markdown document containing several headings possibly in multiple levels, we would welcome an automatic generation of a table of contents (toc). This is inserted at current editor location by μJam at our fingertips.
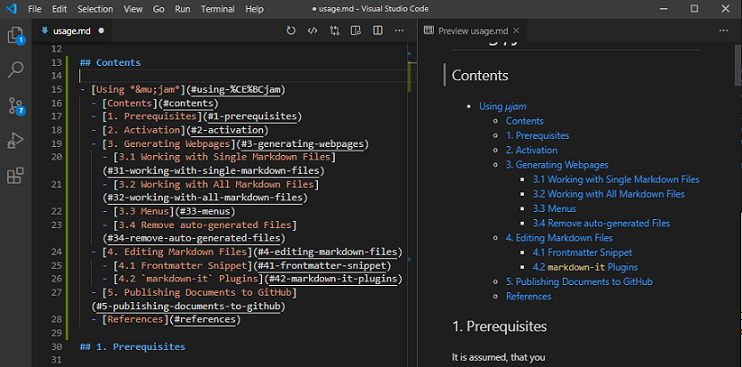
Simply type Ctrl+k t (think toc) for getting this.
Note:
The table of content inserted is static and not configurable, i.e. minimalistic:
- If you do not want to have a heading in the toc (maybe 'Contents'), simple delete it from the generated list in the markdown document.
- Generating certain toc levels only is not supported. Simply remove the unwanted entries manually then.
- If you edit the text of a heading, the toc won't update automatically. Recreate the toc then manually.
- Headings in markdown code sections are incorrectly inserted also. You need to remove them manually.
Navigation List Snippet #
Sometimes we do not want to have an internal table of content, but an external navigation list. With that we might compose a navigation sidebar. In this case we want to have explicite local html url's, as in ...
- [Installation](installationGuide.html#installation)
  - [A New Project](installationGuide.html#a-new-project)
  - [Generating Content](installationGuide.html#generating-content)
  - [Publish to the World](installationGuide.html#publish-to-the-world)
For getting this we type Ctrl+k n (think nav).
Permalinks #
This feature is shamelessly copied from GitHub. In the browser ... whenever you are hovering with your pointer device a heading, a small symbol appears. Hovering then over that symbol, the document-local uri of the heading in question can be copied (right click) and is shown in the status bar at the same time.
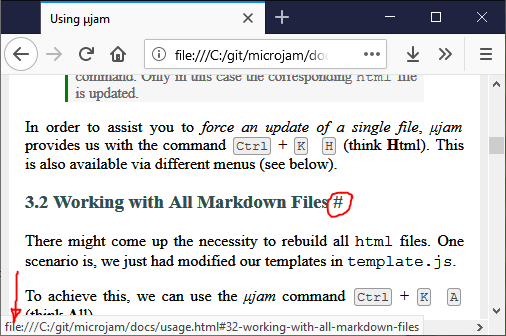
With this feature enabled, your visitors can copy and paste that location and thus link into your pages with the help of these permalinks.
In order to activate this feature, you need to add
---
"permalink": "#"
---
to your page's frontmatter section. You are allowed to take a character symbol of your choice. "permalink": true is also possible, with '#' as the default symbol.
markdown-it Plugins #
VSCode uses markdown-it as its markdown parser internally and so does μJam. There are a lot of markdown-it plugins available. μJam potentially supports only two of them at current:
- Math plugin
markdown-it-texmath - Footnotes plugin
markdown-it-footnotes
Since they are both inactive initially, we can activate them – if we want – by appending the following to .vscode/settings.json ...
"microjam.markdownItPlugins": {
  "markdown-it-texmath": {
    "engine": "katex",
          "delimiters": "dollars",
          "macros": {"\\RR": "\\mathbb{R}"}
  },
  "markdown-it-footnote": {}
}
Extending μJam, in using other markdown-it plugins is possible, but out of the scope of this user manual.
Publishing to GitHub #
We are assuming here, that you have a valid local git and remote GitHub repository already. Read installation guide otherwise.
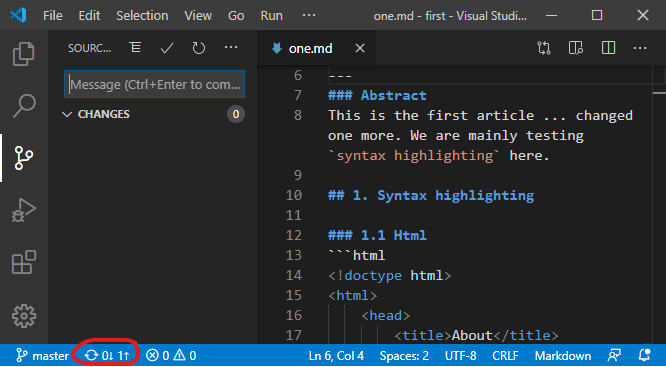
For publishing your generated or modified files to GitHub, you might want to use the Source control view.
- Type in a commit message string.
- Send it by Ctrl + Enter.
- Press the up arrow symbol in the status bar.
The Usual Workflow #
I would like to show you how working at your website looks like, once you installed all and already wrote your markdown files.
- You will again open your project directory
first, which already has the following structure
/first
|_ package.json
|_ /docs
   |_ /theme
   |_ index.html
   |_ one.html
   |_ two.html
   |_ pages.json
   |_ index.md
   |_ one.md
   |_ two.md
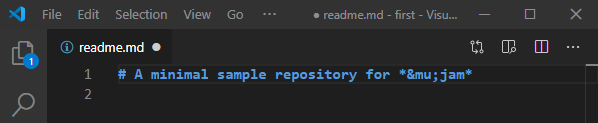
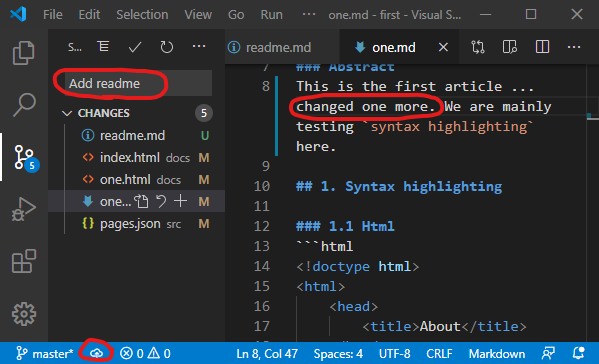
- Add a
readme.mdfile (content below) and save it (Ctrl + Shift + S) to your project root folder. Its content might be somewhat like
# A minimal sample repository for μJam
- Modify the content of
one.mdand save (Ctrl + S). - Type in a commit message
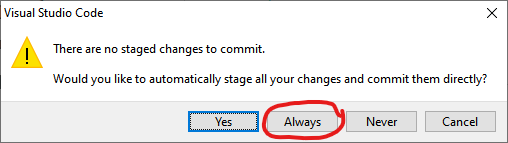
'Add readme'(Ctrl + Enter). - In a possibly upcoming
vscodemessage windowWould you like to automatically ...selectAlways. - In the VSCode status bar select either the little
cloudor theup-arrowsymbol for uploading the changed files to GitHub.
That's it. Please verify the arrival of the readme file at Github and successful update of your website.
Steps 2-3-5 above i.e.
- modify content
- type commit message
- upload to GitHub
is all you need to do from now on.
Just to mention – this documentation was authored by μJam during a process called dogfooding :).
Happy publishing ...
Templates #
- microjam-simple – A simple website template for μJam
- microjam-tufte – A Tufte Style Template for μJam
- microjam-docs – A documentation theme for μjam with sidebar
- microjam-g2 – A theme for μjam + g2
Frontmatter Entries #
| Entry | Type | Comment |
|---|---|---|
author |
string | Author name(s) used by search engines. |
date |
string | Creation date yyyy-mm-dd as in 2020-12-31. |
description |
string | Page description used by search engines. |
lang |
string | Used by browser for hyphenation. Default value is "en". |
layout |
enum | μJam knows the following layout types:["page","article","index","none"]Other custom layout types are supported and treated like page layouts internally. |
math |
boolean | Support of LaTeX math formulas using $ delimiters. |
permalink |
string | true |
Place character symbol as a link anchor behind headings. Default character symbol is "#". |
tags |
array of strings | Used as keywords for search engines. Example ["web,"page","physics","svg"] |
title |
string | Page title shown in browser's title bar. |
uses |
array of objects | Inject external resources into page. Example "uses":[ { "uri": "navigation.md" } ] |
Keyboard Commands #
| Command | Mnemonic | Menu | Action |
|---|---|---|---|
| Ctrl + K H | Html | – | Generate single Html file |
| Ctrl + K A | All | – | Generate all Html files |
| Ctrl + K - | --- | – | Insert frontmatter template |
| Ctrl + K T | ToC | – | Insert Table of Contents |
| Ctrl + K N | Nav | – | Copy navigation markdown to clipboard |
| Ctrl + K V | preView | – | Open preview window |
| Ctrl + Enter | – | – | Commit Changes |
| Ctrl + Shift + S | Save As | File > Save As |
Save file as ... |
| Ctrl + S | Save | File > Save |
Save file |
| Ctrl + C | Copy | Edit > Copy |
Copy text to clipboard |
| Ctrl + V | Paste | Edit > Paste |
Retrive text from clipboard |
Apple users will press the Cmd key instead of the Ctrl key.
References #
[1] jamstack.wtf
[2] Not Your Dad's IT
[3] Where can I find the GitHub ID in my account?
[4]: Version Control Basics with Github and VS Code
[5] Version Controlling with Git in Visual Studio Code and GitHub
[6] Versionskontrolle mit Git auf einem Hoster wie GitHub, GitLab, BitBucket unter Visual Studio Code einrichten
[7] Git Integration in Visual Studio Code
[8] CommonMark - Specification of Markdown
[9] Configuring a custom domain for your GitHub Pages site